Fire Extinguisher Detector Server
This is an example of a Network Compute Bridge server. It is similar to tensorflow_server.py, but uses Keras Retinanet instead of TensorFlow. The provided model specifically detects fire extinguishers.
Build and Export
This example can be run on a local machine directly, but is easier to use with Docker.
The Docker image can be built and exported with the following commands:
# builds the image
sudo docker build -t fire_ext_detector .

# exports the image, uses pigz
sudo docker save fire_ext_detector | pigz > fire_ext_detector.tar.gz
To build the image for CORE I/O:
# Prerequisites
# Install the pigz and qemu packages
sudo apt-get install qemu binfmt-support qemu-user-static pigz
# This step will execute the registering scripts
docker run --rm --privileged multiarch/qemu-user-static --reset -p yes

# Builds the image
sudo docker build -t fire_ext_detector:l4t -f Dockerfile.l4t .

# Exports the image, uses pigz
sudo docker save fire_ext_detector:l4t | pigz > fire_ext_detector.tar.gz
Execution
To run this example on a Spot CORE, run:
./start_server.sh
Otherwise, create a .env file that specifies username and password with the following variables. BOSDYN_CLIENT_USERNAME={username} BOSDYN_CLIENT_PASSWORD={password}
Then run:
sudo docker run -d --name retinanet_server --network host --env-file .env --restart unless-stopped fire_ext_detector -d . --port $PORT $ROBOT_IP
$PORTis the port to use for the server on the machine the server is running on$ROBOT_IPis the IP address or hostname of your Spot.BOSDYN_CLIENT_USERNAMEis the environment variable for the username for the robotBOSDYN_CLIENT_PASSWORDis the environment variable for the password for the robot
To run this example on a CORE I/O, run:
# Load the image
sudo docker load -i fire_ext_detector.tar.gz

# Run the container
sudo docker run -d \
    --gpus all \
    --name retinanet_server \
    --network host \
    --restart unless-stopped \
    -v /opt/payload_credentials/payload_guid_and_secret:/opt/payload_credentials/payload_guid_and_secret \
    fire_ext_detector:l4t \
    -d . 192.168.50.3 --payload-credentials-file /opt/payload_credentials/payload_guid_and_secret
Spot Extension for CORE I/O
This example can also be built into a Spot Extension using a provided convenience script
cd {/path/to/python/examples/network_compute_bridge/fire_extinguisher_server/}

python3 ../../extensions/build_extension.py \
    --dockerfile-paths Dockerfile.l4t \
    --build-image-tags fire_ext_detector:l4t \
    -i fire_ext_detector_image.tar.gz \
    --package-dir . \
    --spx fire_extinguisher_detector.spx
The output file will be called fire_ext_detector.spx and can be uploaded to a CORE I/O.
Action Configuration
To configure the Fire Extinguisher Detector as an Inspection on Spot’s control tablet, go to Hamburger menu –> SETTINGS –> ACTIONS.
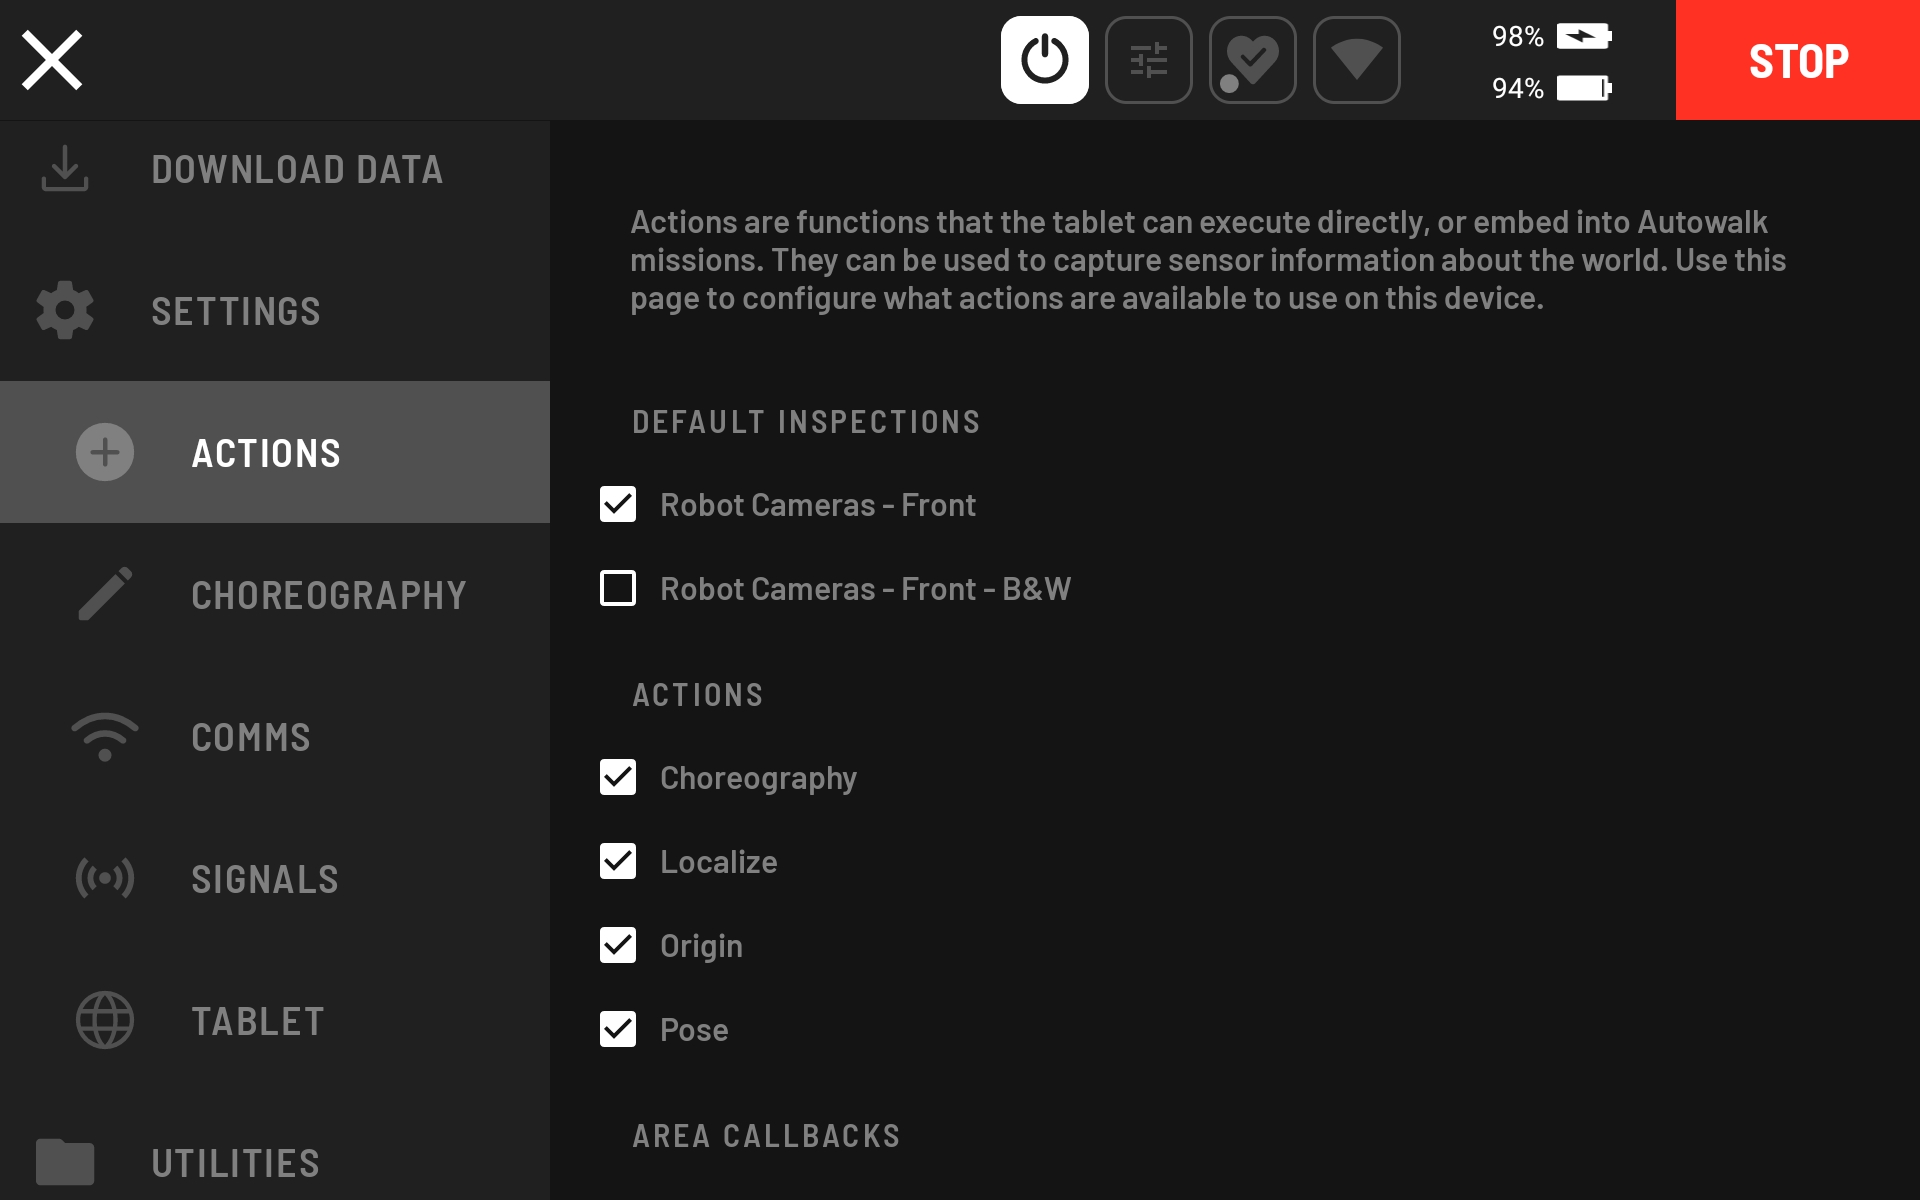
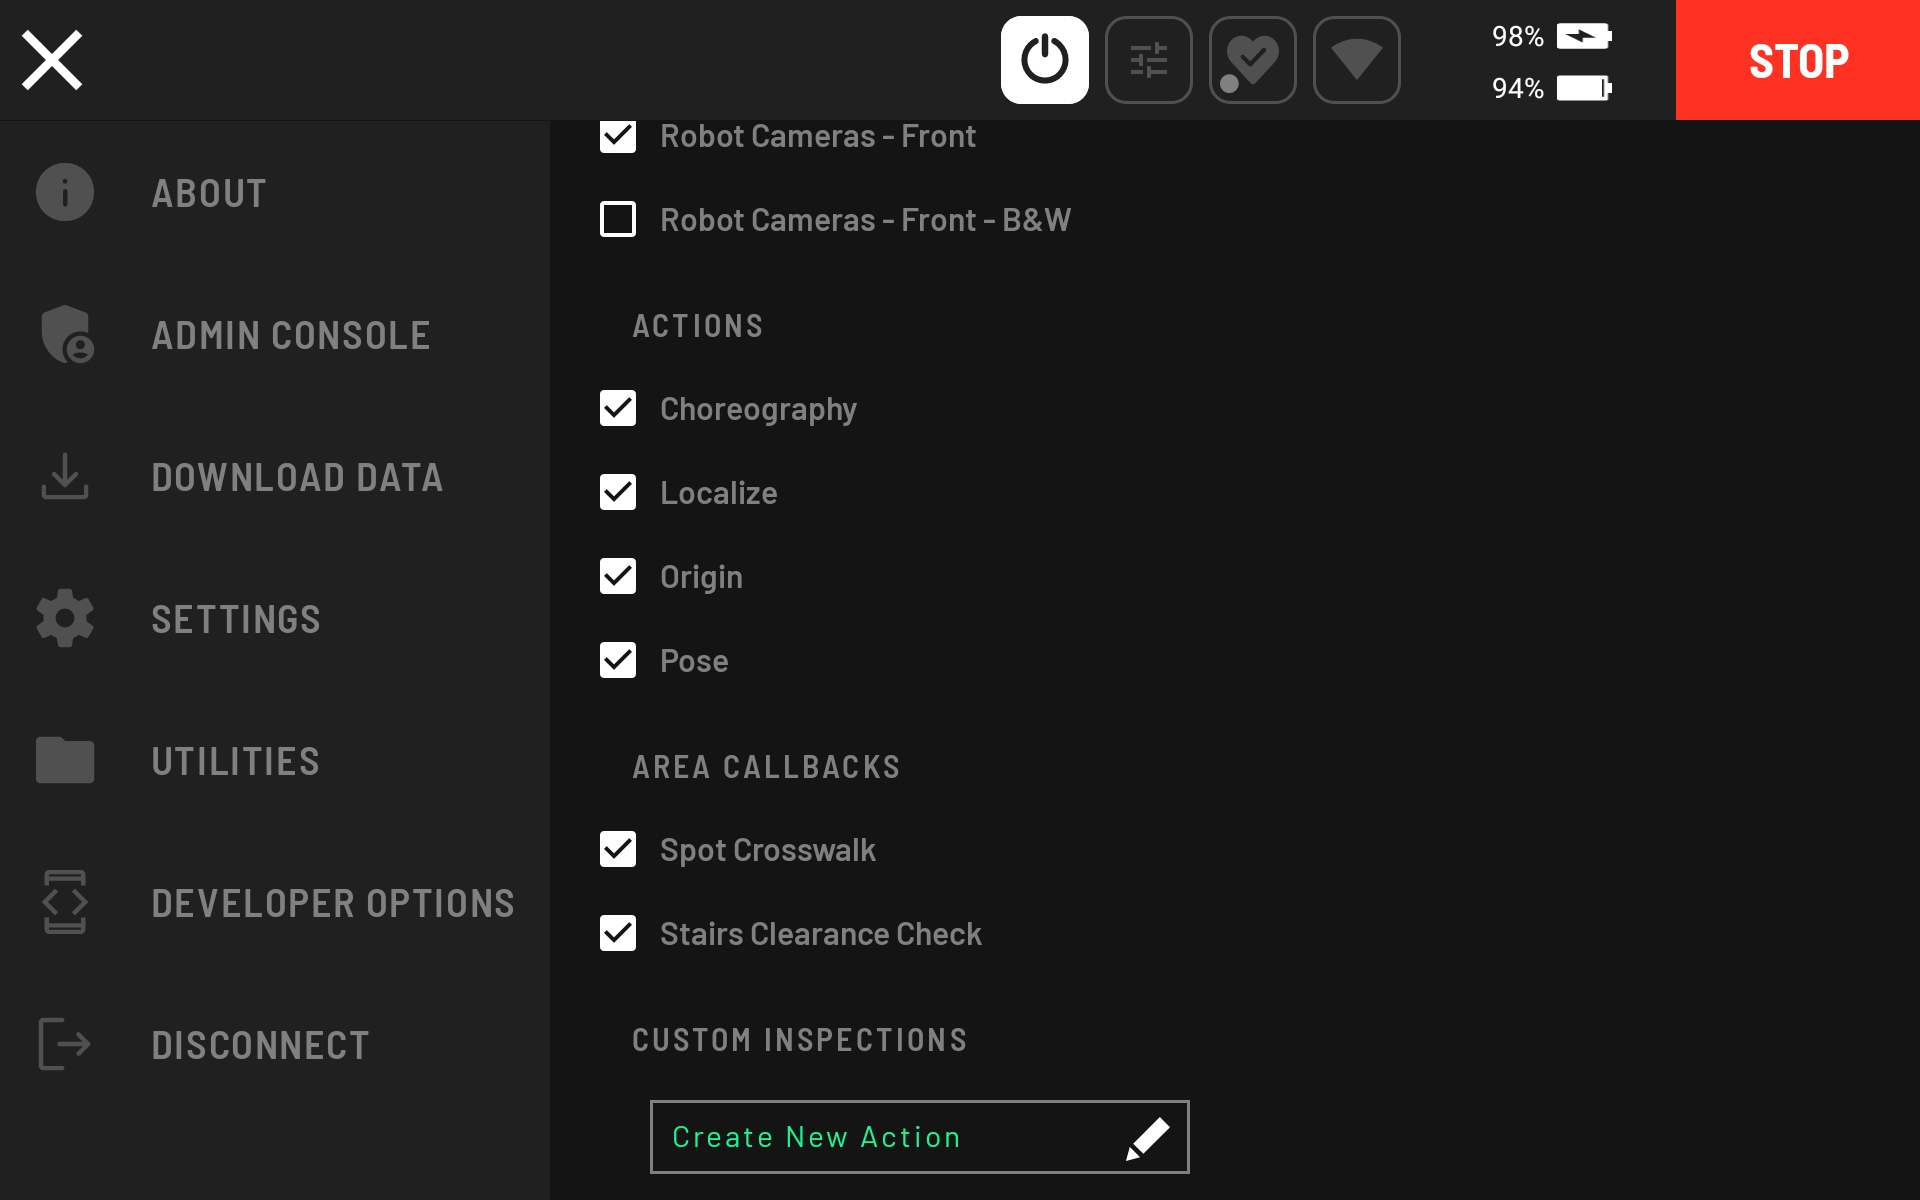
Scroll down to CUSTOM INSPECTIONS and select “Create New Action.”
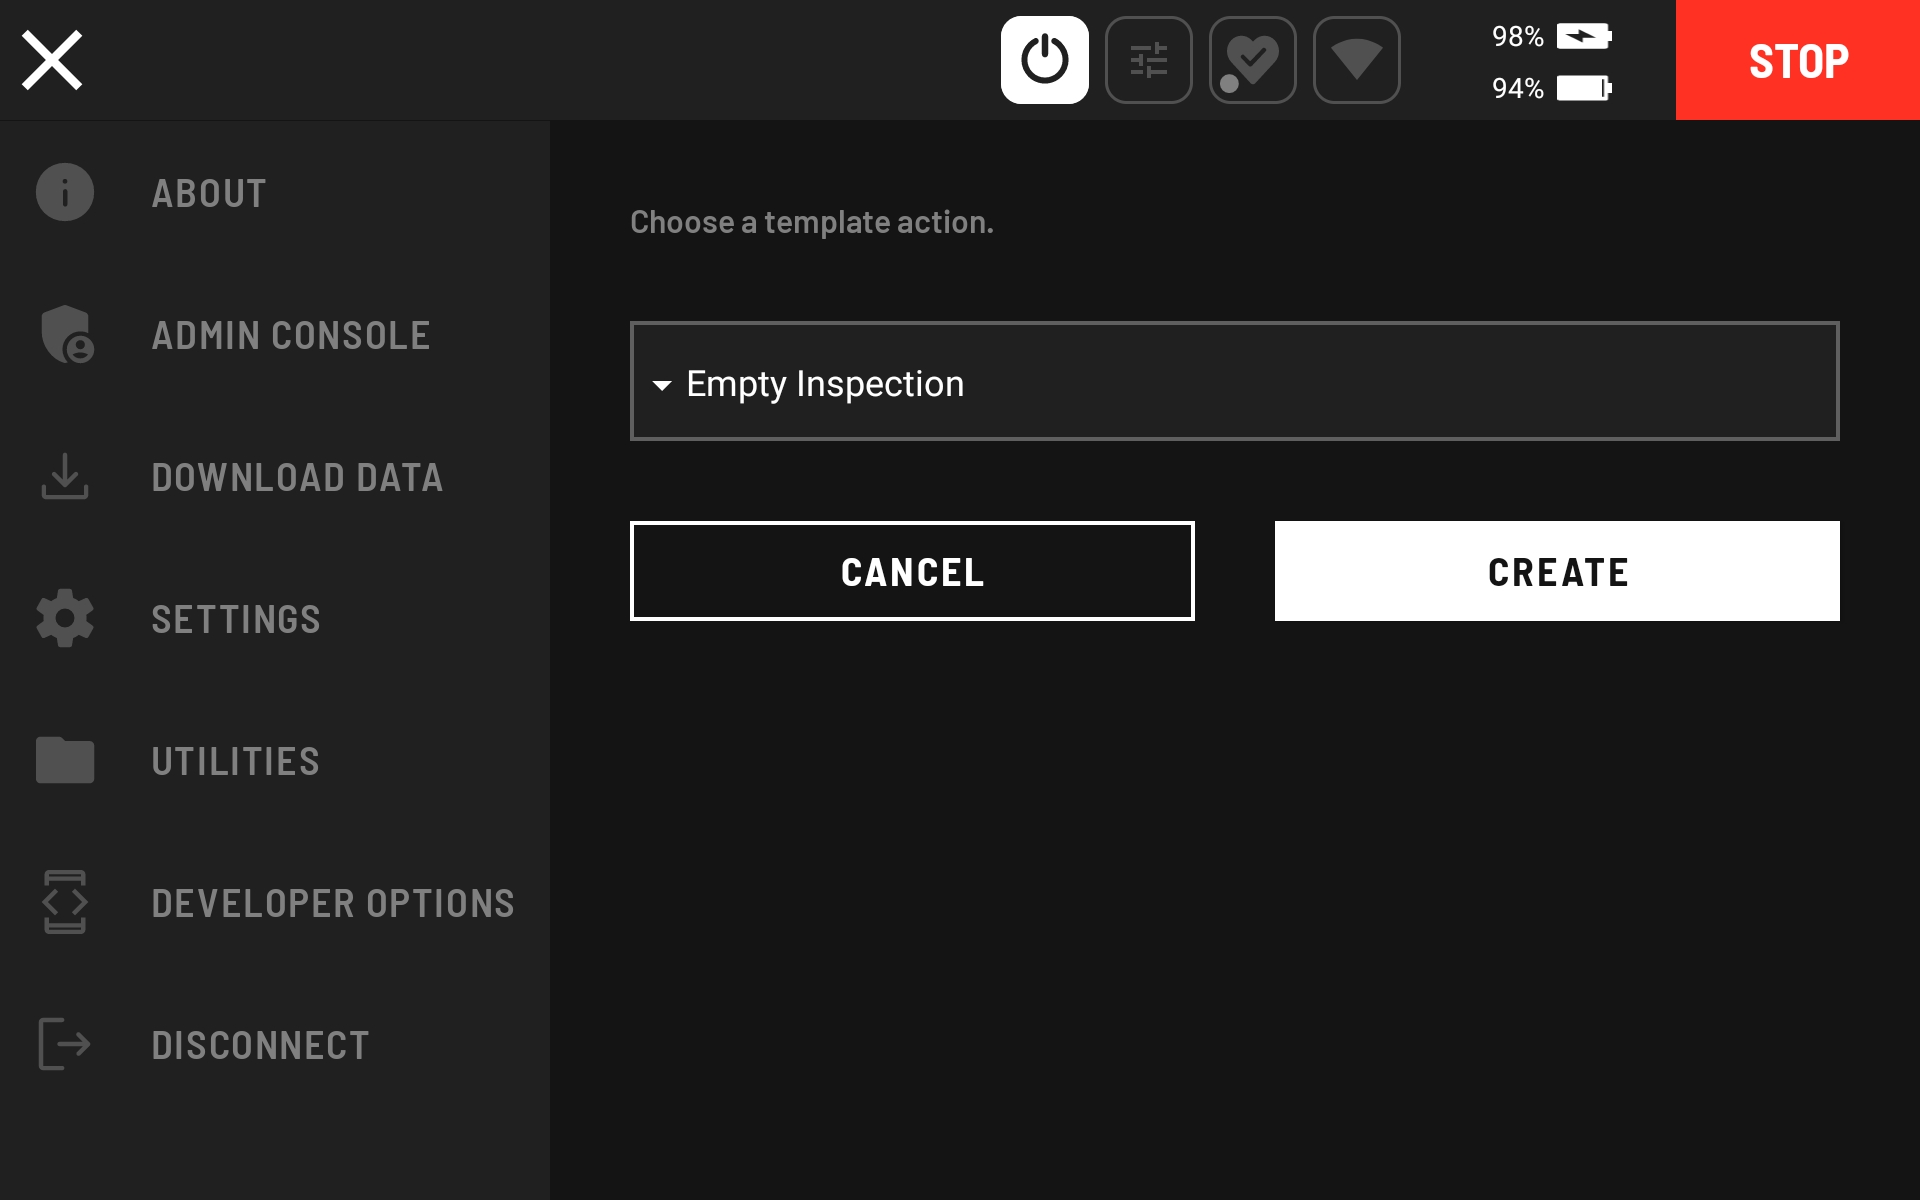
Choose the “Empty Inspection” template action and click the CREATE button.
Set the ROBOT BODY CONTROL to “Body Pose” and the ACTION to “Daq.”
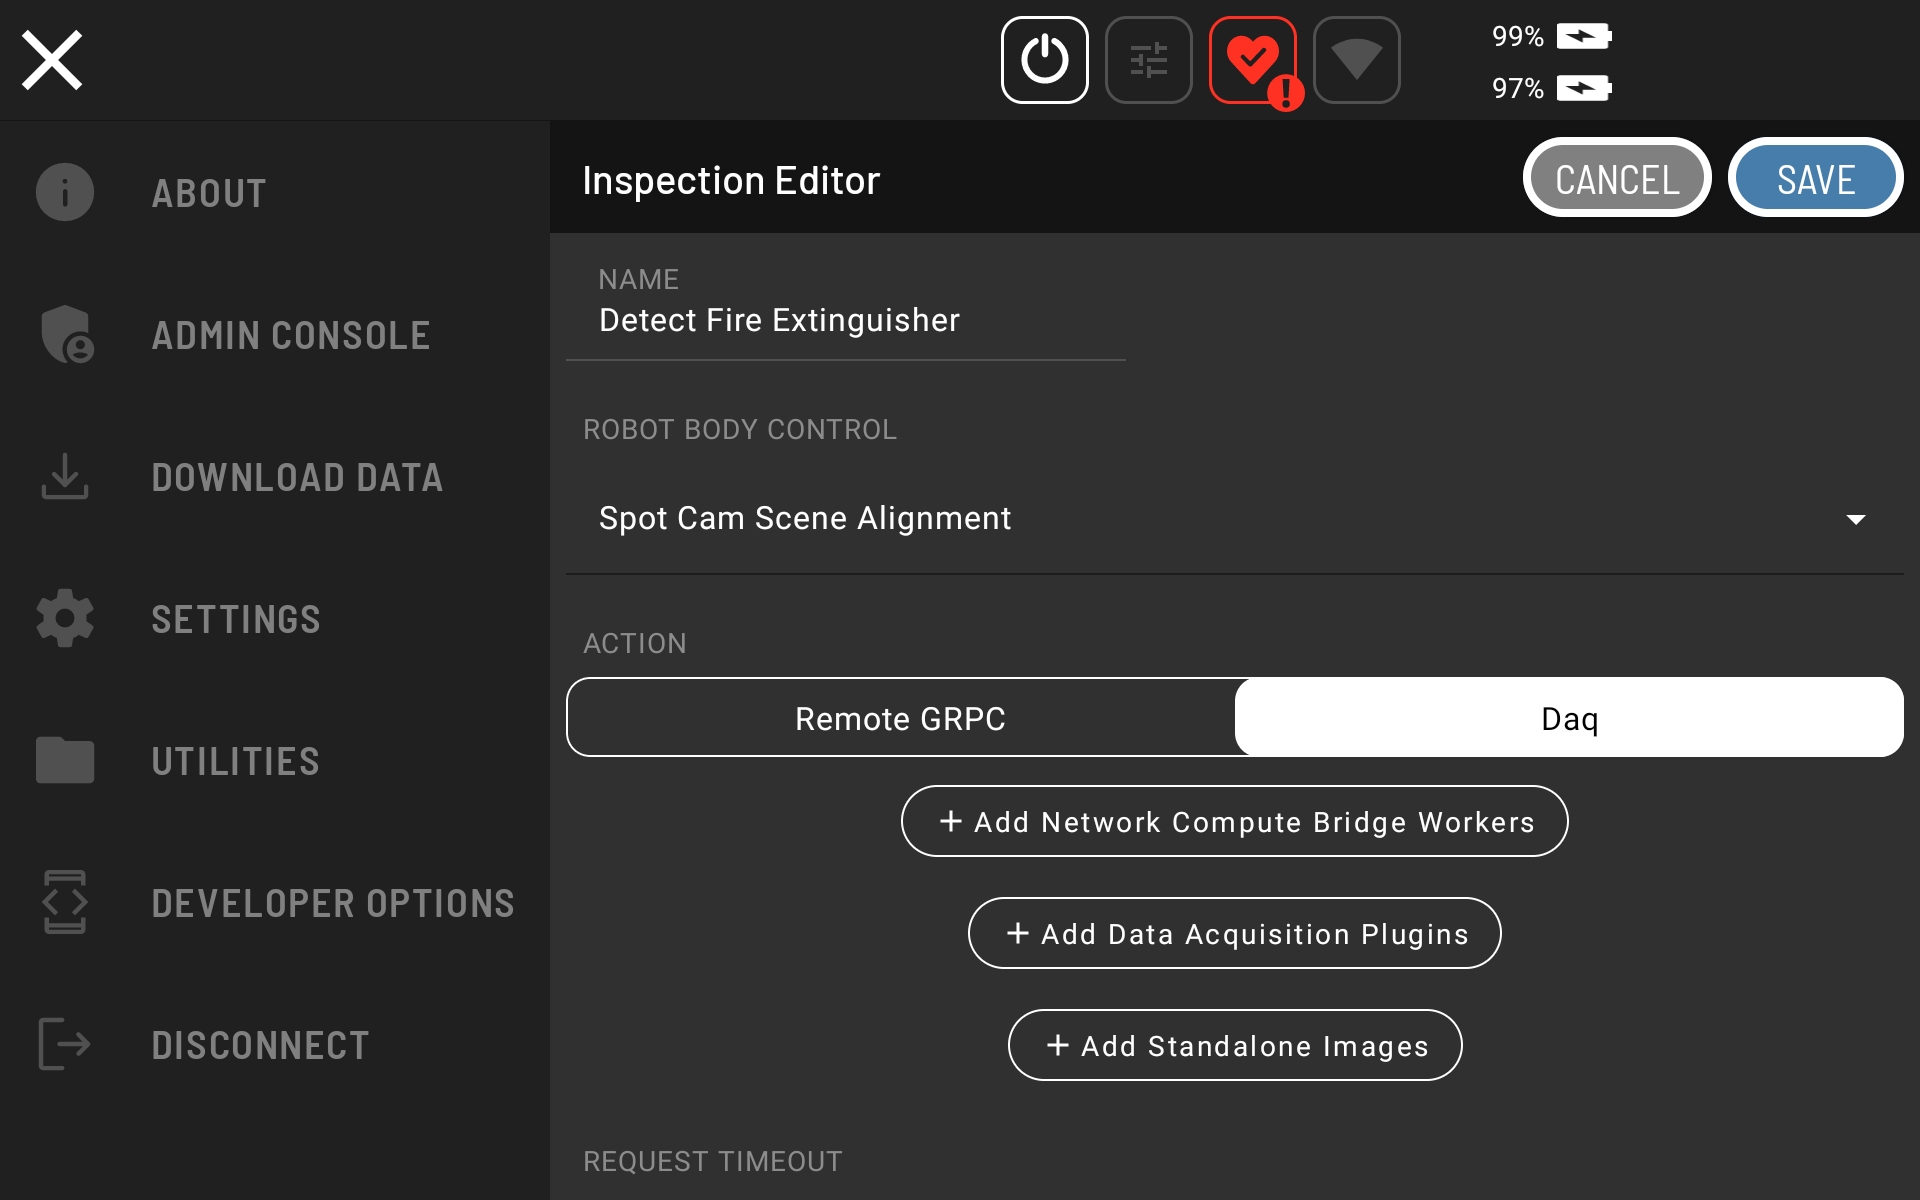
Click “Add Network Compute Bridge Workers” and select “Fire Extinguisher Server - Fire Ext”
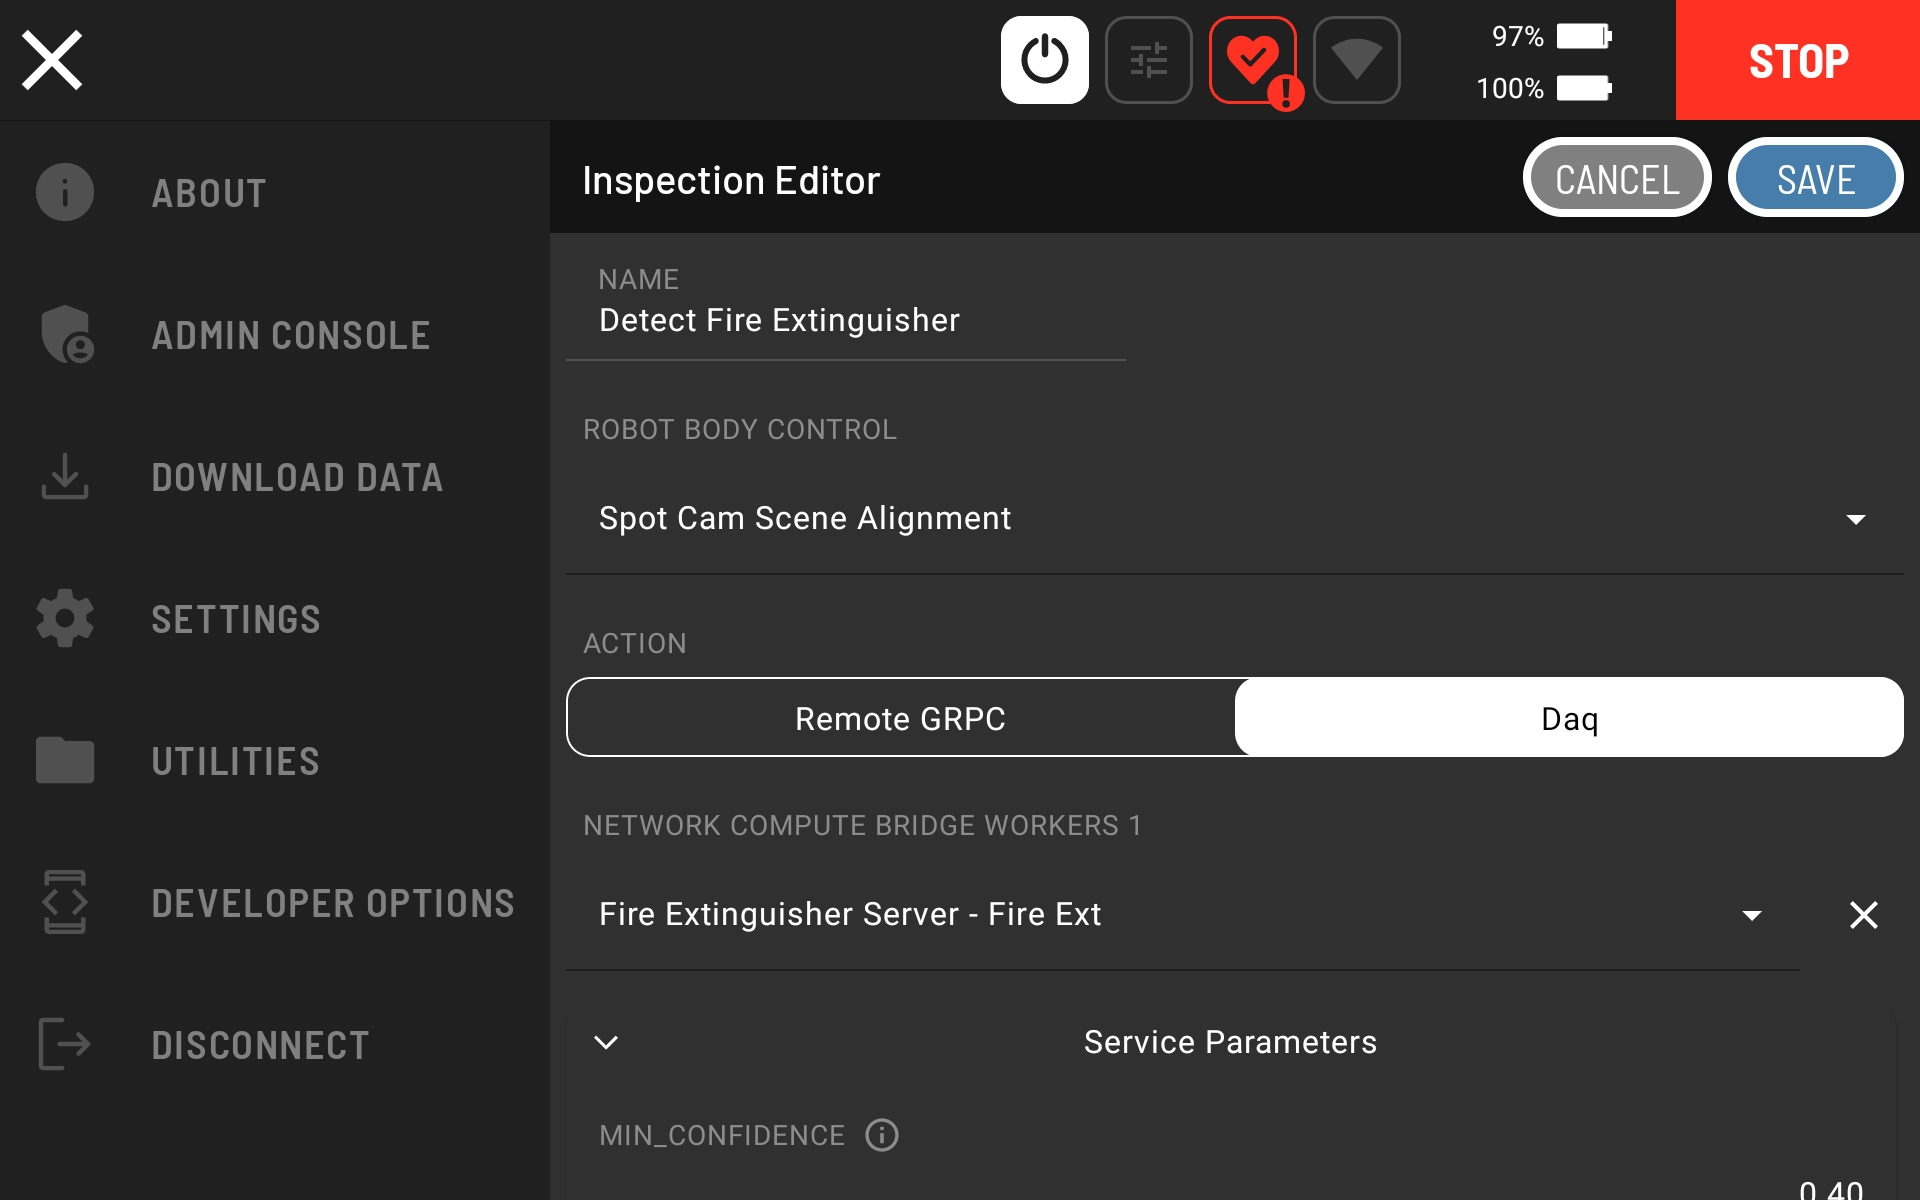
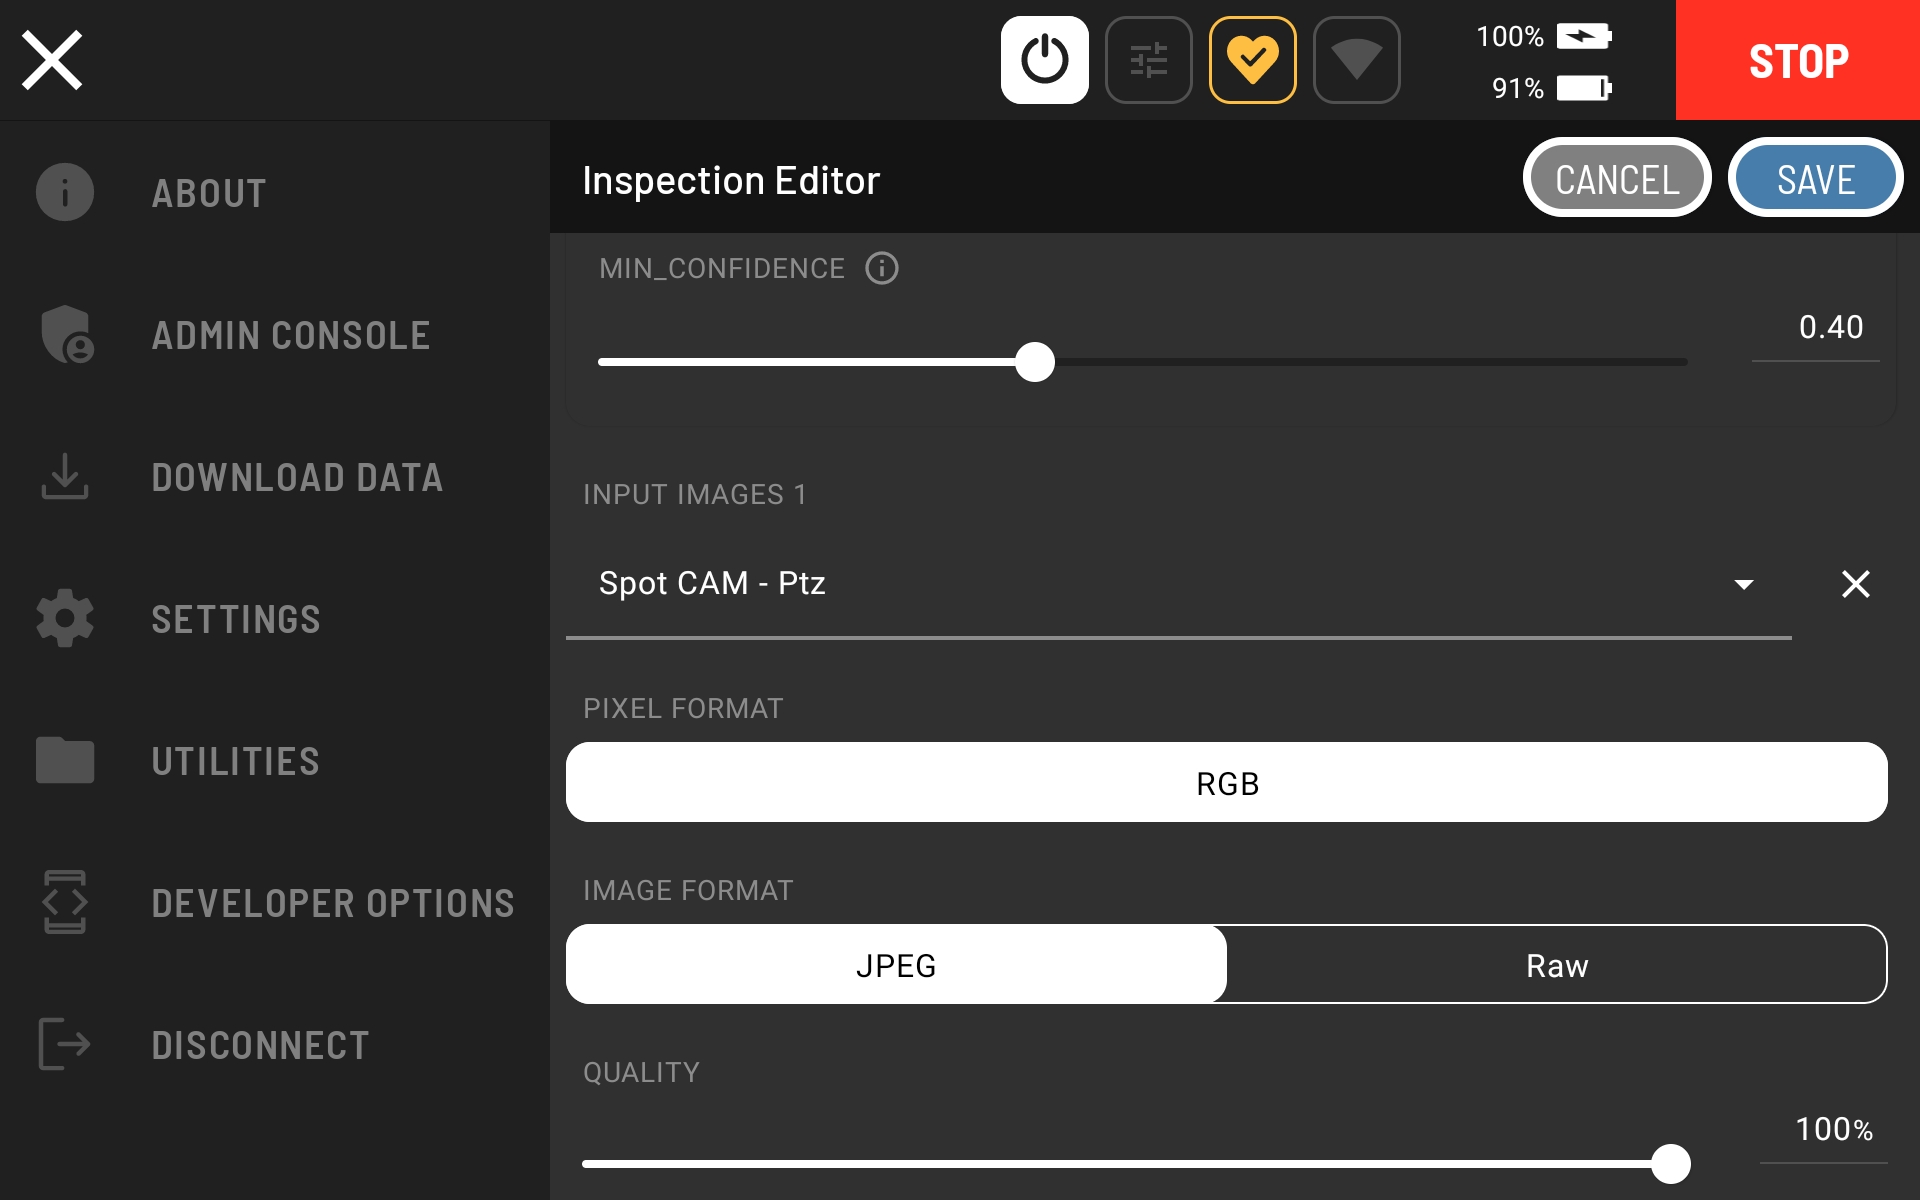
Add the Spot CAM - Ptz as an input image to the Fire Extinguisher Server - Fire Ext Network Compute Bridge Worker. Note that this input image is what will be used as the input to the Worker. It is not a standalone image. So, make sure to add an input image and not a standalone image.
Click save to finish configuring the action.
The configuration can be verified by teleoperating Spot to a fire extinguisher and setting up a clear shot with the SPOT CAM PTZ.
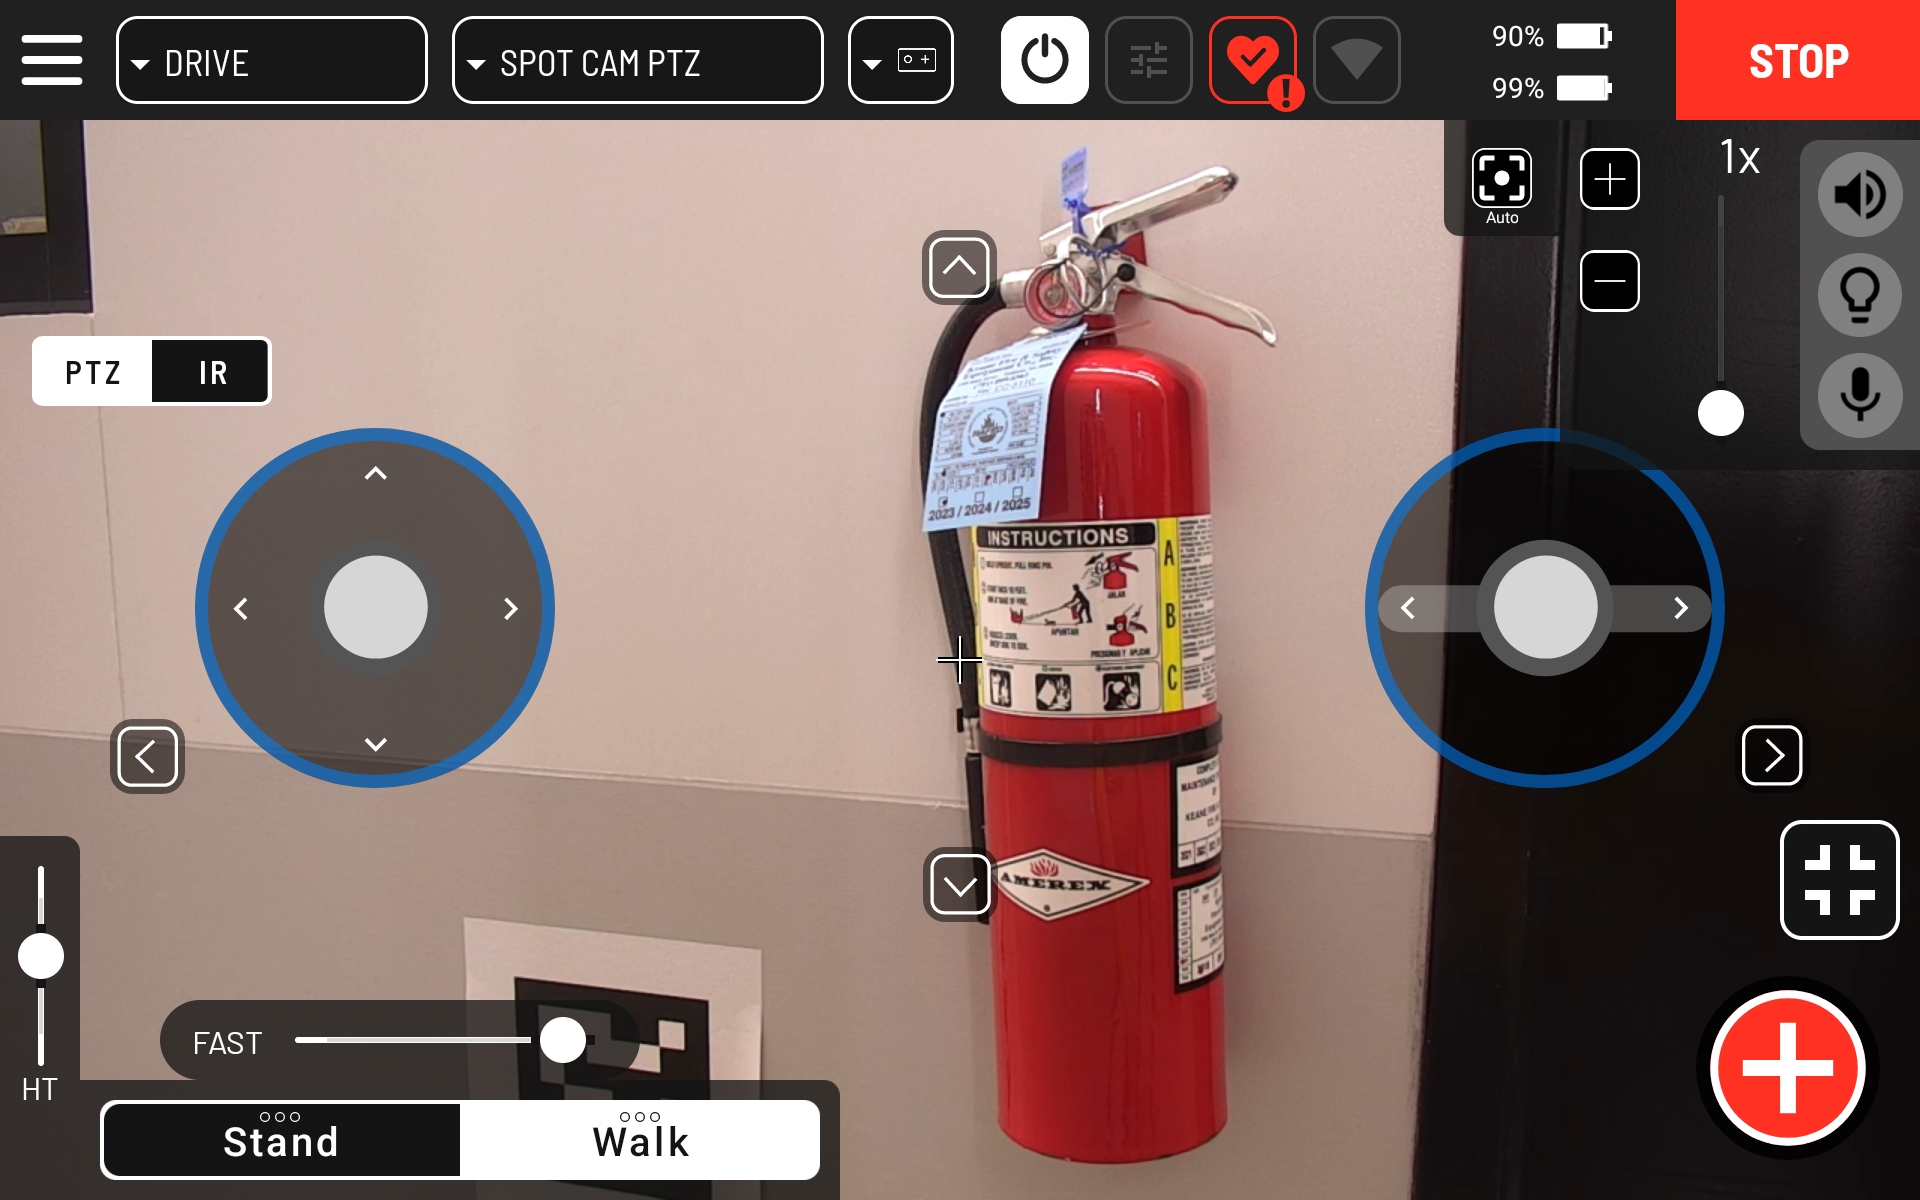
Click the red action button, select the configured action and fine tune the shot.

Click CONFIGURE to observe the input image.
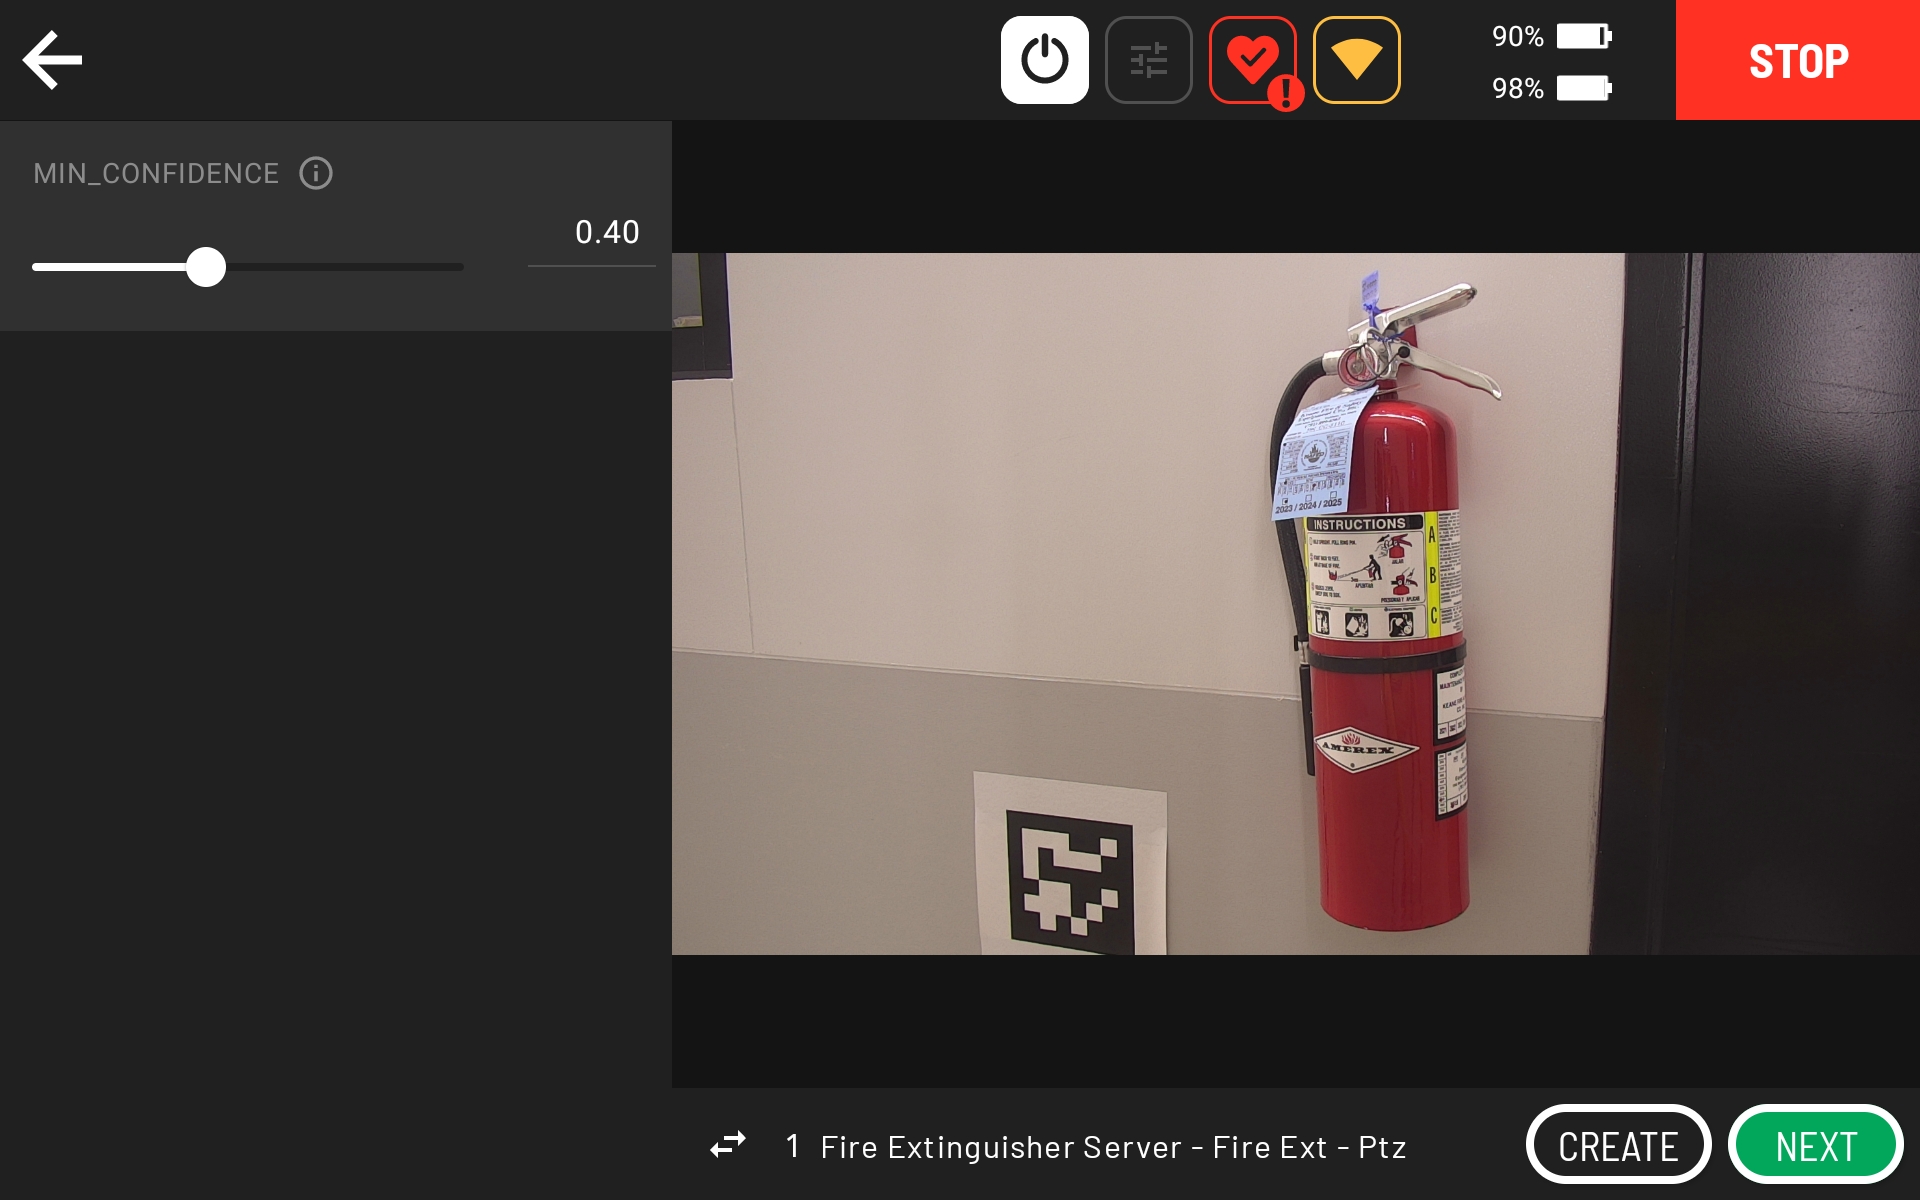
After a short period of time, you can see the output of the worker on the second page by clicking the arrows below the input image.
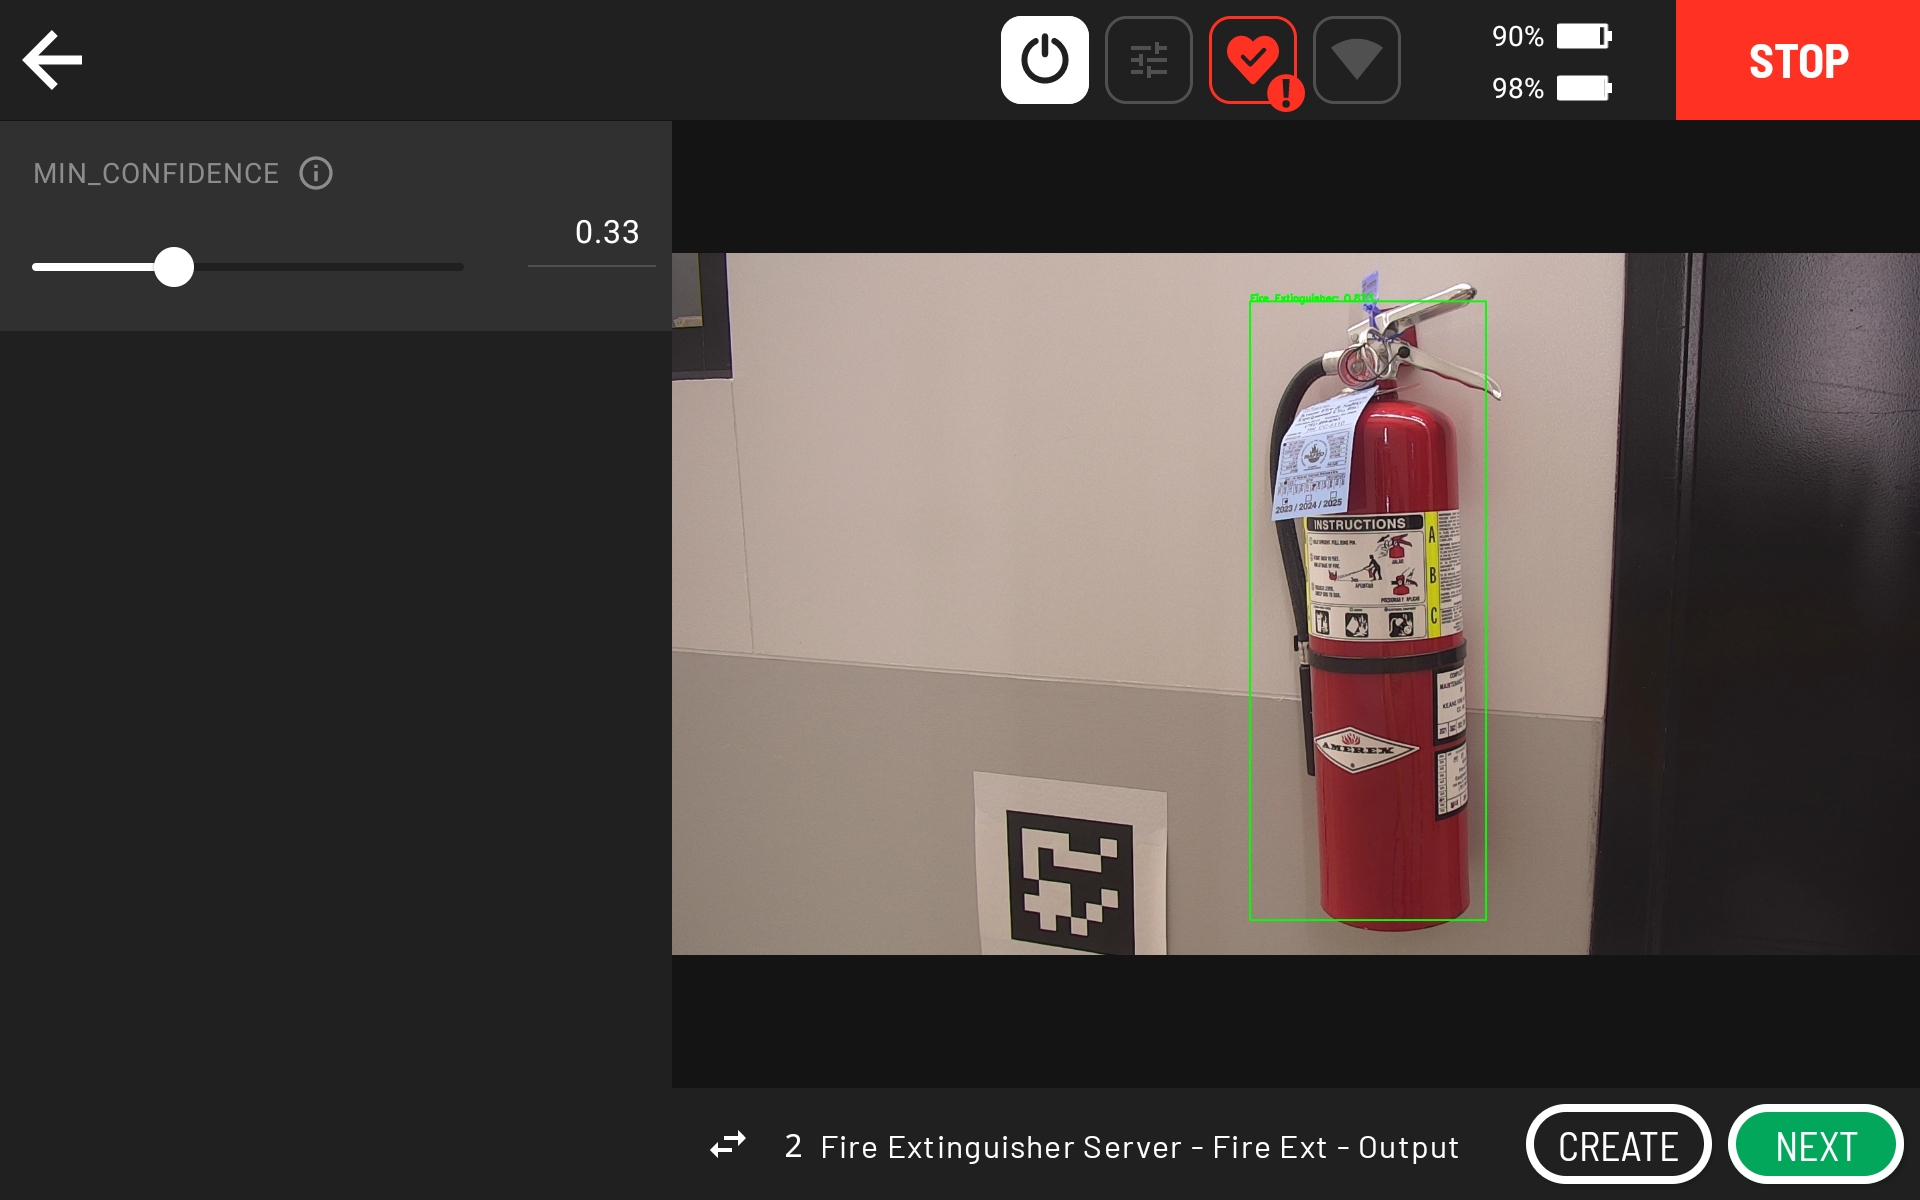
If you see a green box around the fire extinguisher gauge, then the action is configured and working correctly. If you do not see any green boxes, then reduce the “MIN_CONFIDENCE” or exit the action and set up a clearer shot of the fire extinguisher (e.g., consider zooming out further than indicated in the above screenshots).